You want to send and receive e-mails with your Windows server and connect to it by using your clients on PC, smartphone or tablet? In this tutorial we will explain how you can setup your own e-mail server on a Windows system with a static public IP. This tutorial will work for our VPS as well as for our dedicated servers. hMailServer is a free open source program, the setup is rather simple and can be done in just a few easy steps. Next to the default features like SMTP, POP3 and IMAP, the software is capable to detect spam and also a free virus protection like ClamWin can be added.
Installation
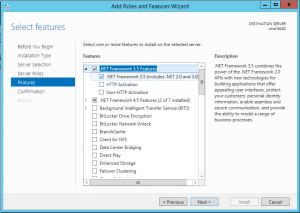
hMailServer needs NET Framework 3.5. to run correctly. Therefore you should add it to Windows before you install hMailServer. To do so, please open the Server Manager. The next steps will differ a little in the different versions of Windows Server. We will explain it by using the example of Windows Server 2012. Please click on “Manage” on the right upper side and choose “Add Features and Roles”. In the window that opens you can click four times on “Next” and leave all the settings the way they are. Now you can choose the features you need to install. You just have to choose the NET Framework 3.5 like shown in the image. With “Next” again, you confirm this selection and “Install” will start the installation. As soon as the process is finished, you can close the window and proceed with the installation of your e-mail server.
Please download the latest version of the software from this site:
https://www.hmailserver.com/download
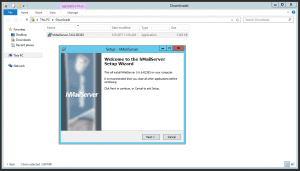
Please do not choose a version that is still in beta, since it might contain bugs and vulnerabilities. After you received the installation package, you can execute it and accept the terms of service.
You should leave the default installation directory as is and continue with “Next”. Now you can choose the required products for installation. You will need the full installation, so please let “Server” and “Administrative Tools” checked and proceed with “Next”. For an easy installation, we do recommend to choose “Use built-in database engine” in the next step. In the following window let the name be hMailServer and proceed. hMailServer will need a password for administrative tasks in the future. So please create a password you want to use to protect your service and write it down. The last step will be to start the installation. It should finish without error.
hMailServer Configuration
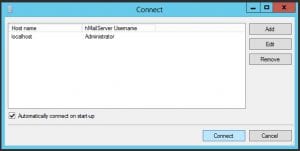
Please open the hMailServer Administrator. In the first window you have to activate “Automatically connect on Start-up” and click on “Connect”.
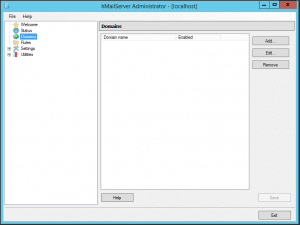
In the next window, please go to “Domains”, choose “Add…” and insert your domain you want to use for sending e-mails.
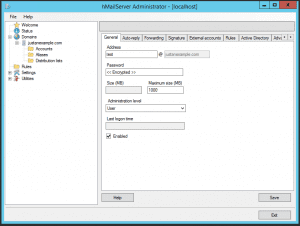
After the domain got saved, you can add new e-mail addresses in the menu “Accounts”.
Now please go to Settings >> Protocols >> SMTP >> Delivery of e-mail. There, please add the local host name of your server that should be used for introducing your server to other e-mail servers. It has to be a valid domain and has to resolve to the IP of your server. So please add an A record to your DNS zone if necessary. You also should set an identical PTR for the IP address of your server. This can be done in the Contabo customer control panel. The host name should consist of three parts. That means it has to be an FQDN and it may not contain too many numbers, since it might seem to be generic. A good name for example might be: “mail.justanexample.com”. When you are done, please save your new settings.
Firewall Configuration
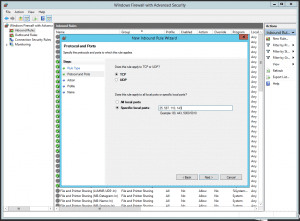
The main configuration is done. But you still have to open all used e-mail ports in the firewall to make it work. Please open the Windows Firewall settings and choose “Inbound Rules”. On the right side click on “New Rule”. A window will open and you have to choose “Port” and click on “Next”. In the next window please insert the ports 25, 110, 143 and 587, as shown in the image.
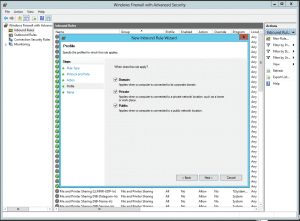
In the following window please choose “Allow The Connection” and after “Next”, please check “Domain”, “Private” and “Public”.
In the last window you can enter a name for the new rule. For example “Ports for hMailServer”. Please finish the setup and close the firewall settings.
Now you should add an SPF record to your DNS zone. Many e-mail servers will reject e-mails from your server if it does not exist. Therefore please add this TXT record to your zone:
justanexample.com 86400 in TXT “v=spf1 ip4:1.2.3.4 ~all”
“justanexample.com” has of course to be replaced with your domain and 1.2.3.4 with your IP.
You should also add an MX record to your DNS zone, if it does not exist already. The MX record should look like this:
justanexample.com 86400 in MX 10 “mail.justanexample.com”
The value “mail.justanexample.com” has to be replaced with the the host name you have chosen for your e-mail server.
The basic setup of your e-mail server is now complete. It should be able to send and receive e-mails as soon as the DNS changes are active and you can now connect with any e-mail client like Outlook, Thunderbird or Apple Mail.
Client Configuration
Please use the following settings for your e-mail client.
ingoing server:
protocol: IMAP; port: 143; security: none; server: the IP or host name of your server
outgoing server:
protocol: SMTP; port: 587; security: none; server: the IP or host name of your server
Security
If you want to do some optimizations to the server security like transport encryption, spam checks and malware protection, please take a look at our second tutorial: E-mail server in Windows Server, part 2: Security.
