This is a follow-up to the tutorial How to install an e-mail server in Windows, directed to those who already have an hMailserver and want to increase the security.
Spam protection
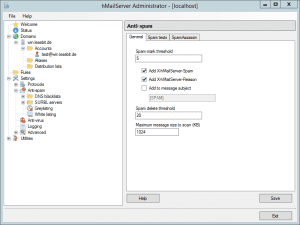
To activate the spam protection, please go to Settings >> Anti-spam in the hMailserver Administrator.
In the tab “General” you can leave the settings the way they are, as shown in the image. Of course you can adjust them later according to your needs.
In the second tab “Spam tests” you should select all four spam detection parameters:
– Use SPF (3)
– Check host in the HELO command (2)
– Check that sender has DNS-MX records (2)
– Verify DKIM-Signature header (5)
Malware protection
As already mentioned in the previous tutorial, you have the possibility to use different anti malware software in hMailServer. The most easy solution is to use the free ClamWin anti virus scanner. You can download it there:
https://sourceforge.net/projects/clamwin/
Please follow the installation wizard. Installing the browser extension is not required for your e-mail server. Normally ClamWin will now appear in the Windows system tray and start to update its database once a day. It will also protect your system from malware. You are of course free to change those settings individually in the ClamWin menu. The integration in the hMailServer is easy. Please go to Settings >> Anti-Virus >> ClamWin. The button “autodetect” will find the correct path to your ClamWin anti virus installation and you can finish the setup with “Save”.
TLS encryption
To enable your clients to start an encrypted connection to your server, so nobody can steal your data, you have to enable this in your settings first. You will need an SSL certificate to achieve this. If you do not have already one for the host name of your server, you can create a self signed one on your own. Self signed certificates are free. But you will have to add an exception manually each time you set up a new client for your server. Most clients like Thunderbird or Outlook will ask you for that after the credentials got entered and they start the first connection. You can use XCA to create such a certificate:
https://sourceforge.net/projects/xca/
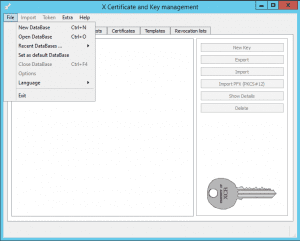
After the software got installed and opened, you have to create a new database on the upper left side. You can choose any name, you do not even have to remember the password. We will need this tool only once to create the new certificate. You can remove it again afterwards.
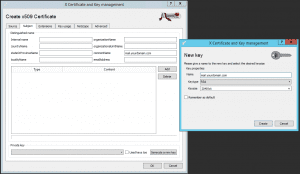
After the new database got created you can choose the tab “Certificates”. In the following menu please choose “New Certificate” on the right side. A new window will open. In this new window please choose the tab “Subject” and add your host name next to “commonName”. In our example screenshot this is mail.yourdomain.com. Now please create a key for the certificate by pressing the button “Generate a new key”. The options in the window normally will be inserted correctly per default as shown in the image. You can finish the creation with “create”.
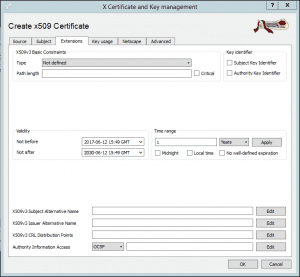
The next step is to switch to the tab “Extensions”. Enter a date until the certificate will be valid. You can be generous at this point. In our example we set a date in the year 2030 for “Validity not after”. With the “OK” button in the bottom right corner you will finally create the certificate.
Now you have to export the certificate and the according key. Please choose in the tab “Certificates” the certificate and click on “Export” on the right side. You can let the path the way it is. In our case it is:
C:\Program Files (x86)\xca\mail.yourdomain.com.crt
In the tab “Private Keys” please do the same for the previously created key. The path should be:
C:\Program Files(x86)\xca\mail.yourdomain.com.pem
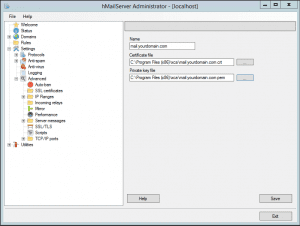
Please open the hMailServer Administrator and navigate to Settings >> Advanved >> SSL certificates and click on “Add”. Now you have to add the previously exported certificate and key as shown in the image below and save the settings.
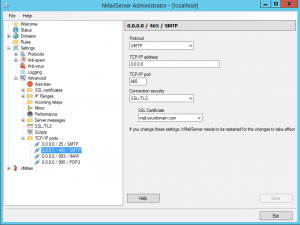
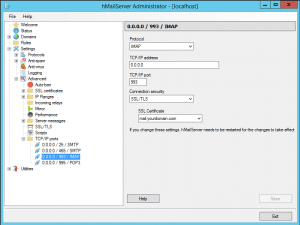
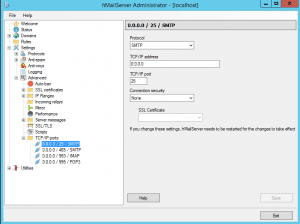
For the last step please go to Settings >> Advanced >> TCP/IP ports. There you have to modify the three entries below “0.0.0.0 / 25 / SMTP” as shown in the following images. At “SSL Certificate”, please choose your recently created certificate. “0.0.0.0 / 25 / SMTP” has to stay in its original state as the only one. If you change it, your e-mail server will not work properly!
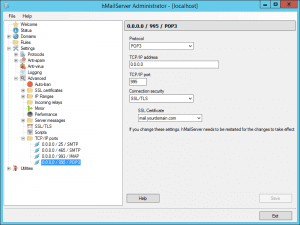
Now you have to open the new ports in your firewall. For that you can edit the rule from the previous tutorial. We called it “Ports for hMailServer” there. Please change the “local ports” from 25, 110, 143, 587 to 25, 465, 993, 995. (Windows Firewall with Advanced Security on Local computer >> Inbound Rules >> Ports for hMailServer >> Protocols and Ports)
The settings for your clients have changed too:
ingoing server:
protocol: IMAP; port: 143; security: SSL/TLS; server: the IP or hostname of your server
outgoing server:
protocol: SMTP; port: 587; security: SSL/TLS; server: the IP or hostname of your server
